NAPA Know How: Busted! How to Fix Broken Plastic Trim
[ad_1]
Unlike the classic American cars on the 1950s and earlier, modern automobiles are full of plastic. From door panels and dash pads to the engine cover, plastic is everywhere. While this may be an affordable way for today’s auto manufacturers to build cars, the fact remains that plastic simply does not last as long as metal. Eventually, these plastic components fade and crack, leaving you with the task of replacing it or living with busted parts on your car. But you can fix broken plastic trim if you follow a few steps.
The 1960s saw the biggest change over from metal to plastic. As metal became more expensive and plastic forming technology grew, the automakers quickly grabbed onto plastic as the material of the future. Not only is it cheaper to make, plastic components are much lighter and weigh a fraction of what metal counterparts would. By the 1980s, everything on the inside of a car was plastic. Pop the hood on just about any car made from the late 1990s and you will likely find engine components that are made of plastic. General Motors has even been using composite plastic components inside the engine itself.
There is not much you can do when composite engine components fail, that is usually a replacement item. On the other hand interior and cosmetic components are easily repaired if you take the time to work it out yourself. All you need are a few products that are readily available at any NAPA Auto Parts Store to fix broken plastic trim parts.
Supplies
Items needed to fix broken plastic trim:
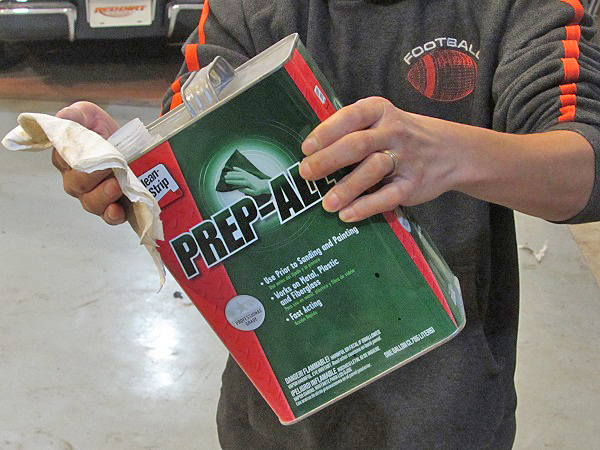
JB Weld Plastic Repair, Kwik Weld, or Original epoxy
Dupli-Color Truck Bed Liner Aerosol
Prepare To Repair
Cleaning the panel with wax and grease remover is the best way to get the part clean without damaging the plastic.
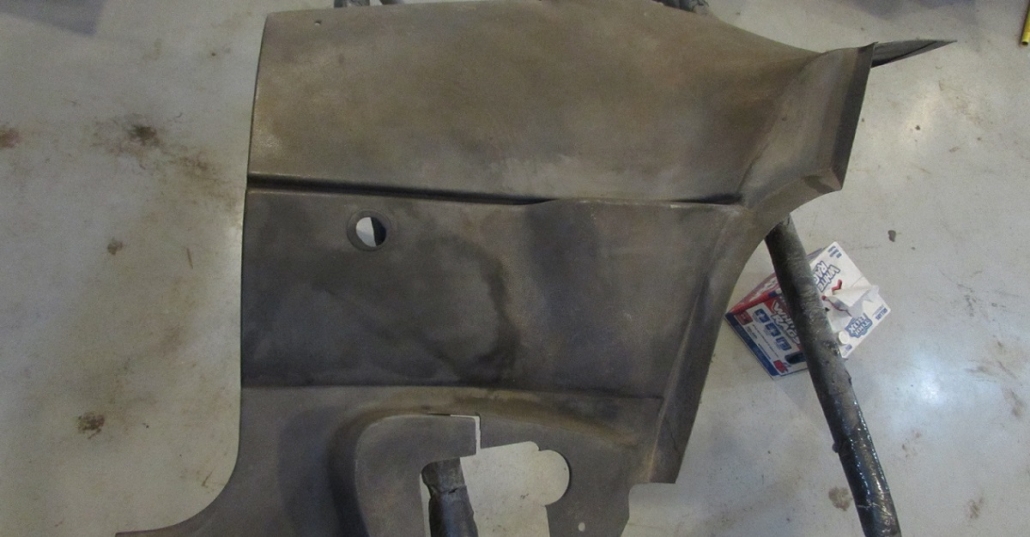
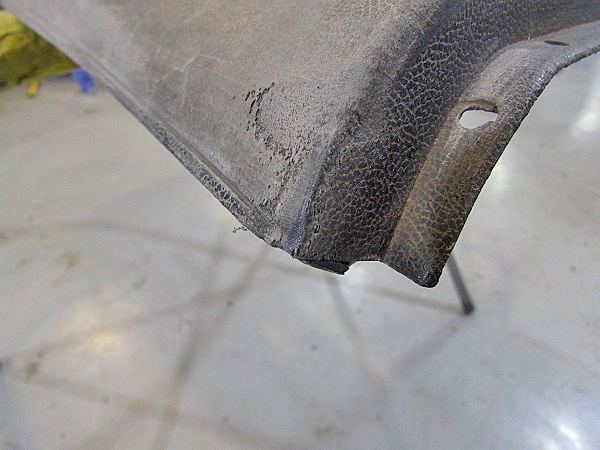
We had a pair of sun-bleached plastic door panels from a 1974 Dodge Challenger that were in need of some restoration. Over time, the sun eats away at plastic and eventually it starts to flake off, much like how steel rusts. In addition to the crusty surface, one corner on each panel had split. These panels are hard to find and expensive. Repairing the panels costs less than $20 and 3 hours (not including cure times).
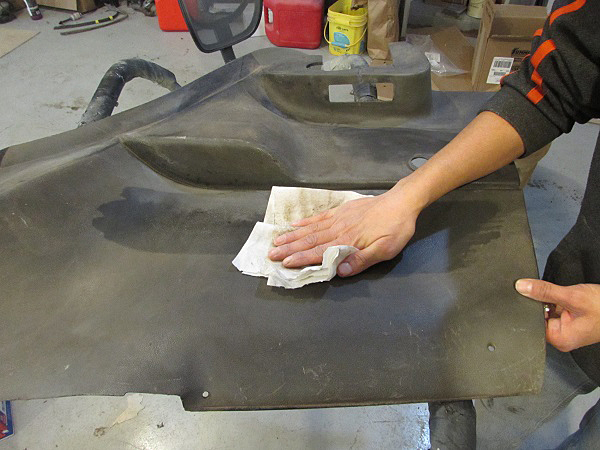
We used some lint-free shop towels to clean the part. You have to wipe the wax and grease remover on and then wipe it off with a dry cloth.
The process begins with a quick clean up. The panels were wiped down with wax & grease remover. You can use window cleaner, or even soapy water, you just want them to be clean before you start.
Corners are a high stress area, cracks are common here.
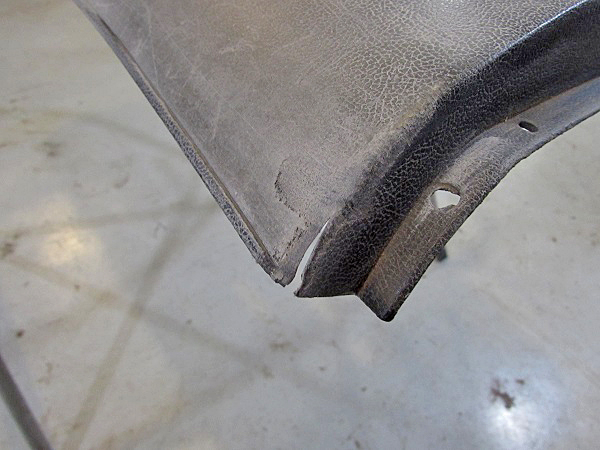
Next, the crack was located and assessed. For this repair, the epoxy will be added to back of the panel, which makes the final finish much easier.
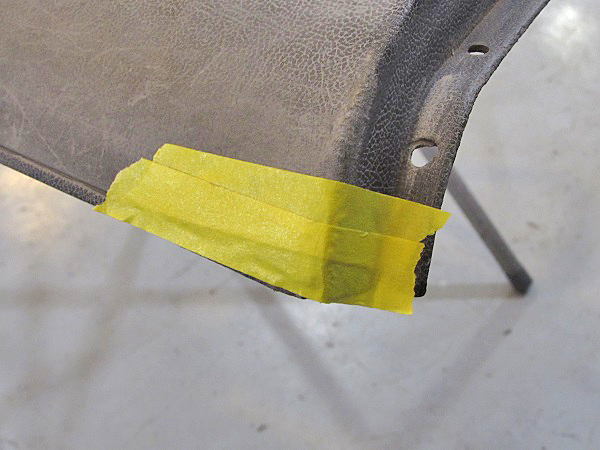
The crack was closed and taped up with masking tape as a backing for the epoxy.
Using the masking tape, we closed the crack and secured it.
The Fix Is In
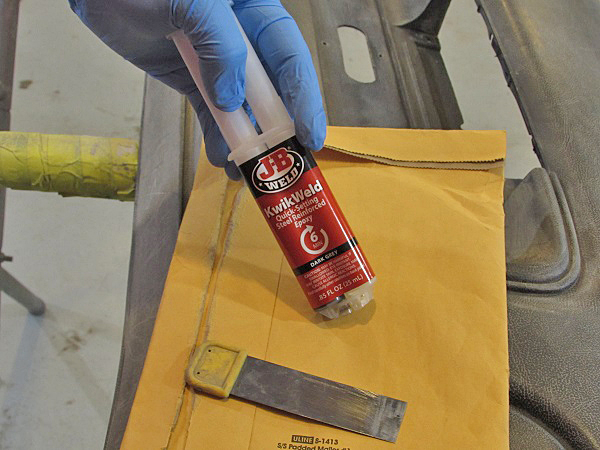
JB Weld Quick Weld works great on metal, fiberglass and plastic. It is metered out in the proper ratios with the plunger.
The tube just measures out the material, it has to be mixed by hand.
Next, we mixed the JB Weld Kwik Weld. You don’t need much, just enough to cover the repair.
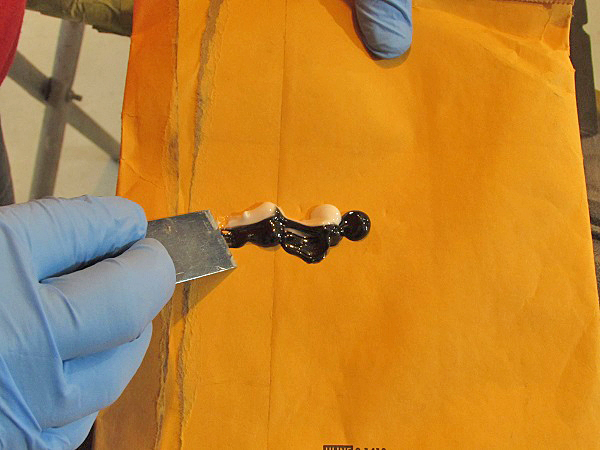
Next, the epoxy gets pressed into the split from the back side. This reduces the amount of finish work required on the visible side.
The epoxy was spread onto the crack, pushing it into the split.he crack was then pushed together and taped again to ensure it would stay closed. The Kwik Weld hardens in 6 minutes, and fully cures in 4 to 6 hours.
After about 15 minutes, we removed the tape exposing the repaired crack. It could be left like this, but there is some texture loss that needs to be addressed.
The panel was sprayed with a white guide coat before sanding. This helps us see all the damaged areas.
Finishing
Once the repair was complete, we sanded the panel with the 320-grit sandpaper. Anything more coarse than 320 will leave sanding scratches in the final finish. The goal here is to smooth out the oxidized layer, taking off the chalky plastic, leaving the good layer intact.

In order to remove any loose material on the panel, we sanded it down with 320-grit sandpaper.
The sanding action removes some of the grain, though much of it was already gone due to the chalky plastic. We can’t replace the exact grain, but we can get pretty close with spray-on bed liner. Plastic is inherently difficult to paint, so we need to prep it well. First, it is cleaned with the wax & grease remover (you need to use this product for this step).
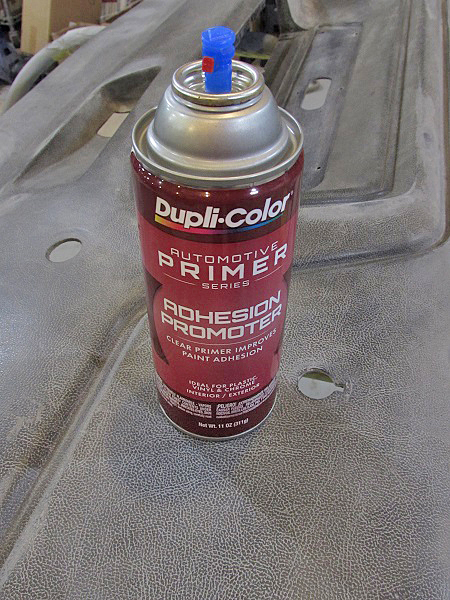
Plastic is hard to paint, as it is an oil-based product. Adhesion promoter helps soften the material, providing a chemical bond as well as a better mechanical bond for the paint.
Next, we sprayed the panel with Dupli-Color Adhesion Promoter. This slightly softens the plastic, providing a mechanical bond that the paint needs to stick.
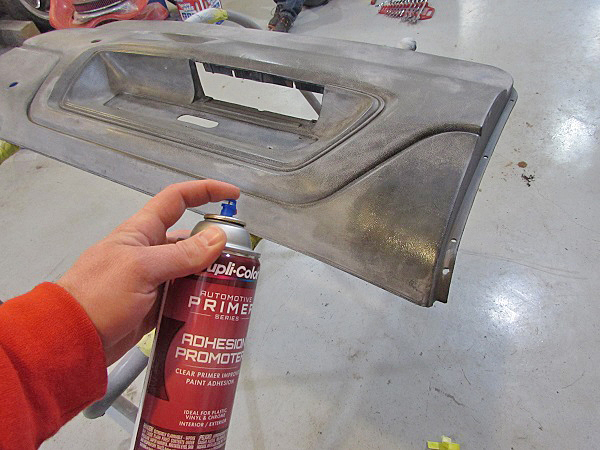
Spraying the adhesion promoter is done in two medium coats, with 15 minutes dry time between coats.
Adhesion promoter requires two coats with a 15 minute rest between coats, and then a top coat within one hour.
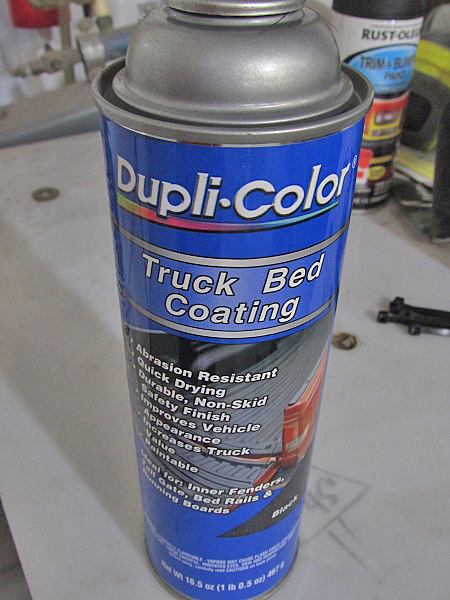
Spray-on bed liner works really well for this process. experimenting with different spray distances, angles, and even mixing bed liner and bumper trim paint can yield different results to match grain.
To recreate the grain, we need a paint that not only is durable, but also formulated for texture. There are many different paints that we could use for texturing. A light grain is best matched with bumper trim paint, but the heavy grain on the Challenger panel needs a larger texture, making the truck bed coating a better match.
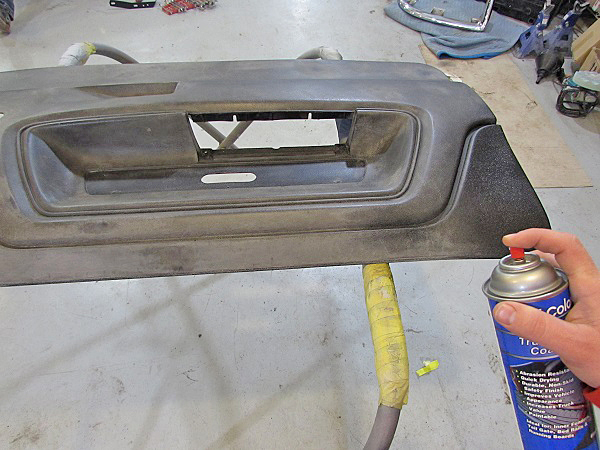
Several light coats are best when working with bed liner. Too much build up at once will not look right.
The trick to spraying this stuff is to use several light coats, sprayed from 8 to 15 inches away. The distance gives the paint a chance to dry slightly in the air before hitting the panel. This means the droplets vary in size, the result is a simulated grain that mimics the original grain of the plastic.
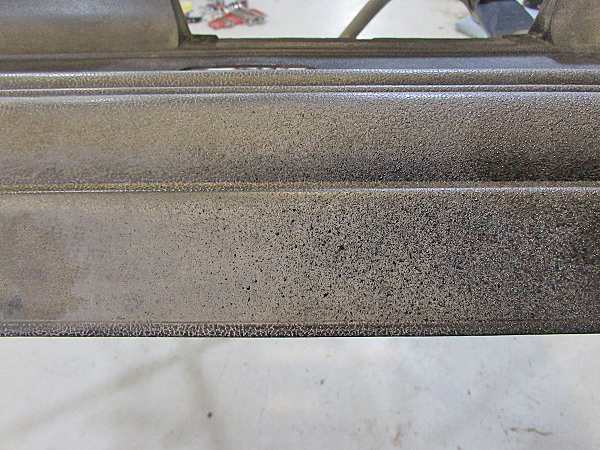
Here you can see the various droplet sizing and how the grain is recreated.
The bed liner requires a minimum of 3-4 hours of cure time before touching, but you need to wait 24 hours before reinstalling them.

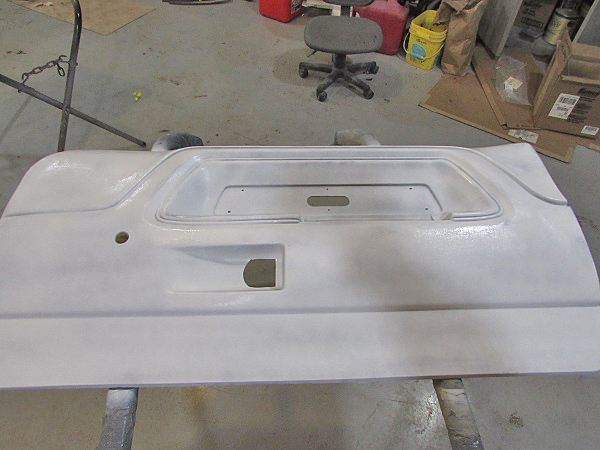
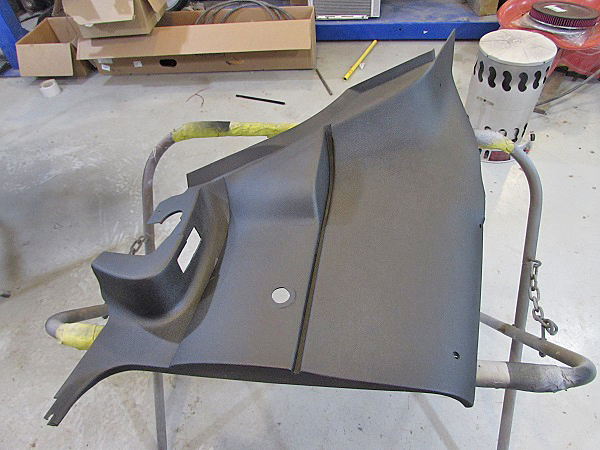
All done, the repaired door panel is ready to be re-installed.
You might notice that the panels are black. Bed liner is always black, which while that works out well for black interiors, it might not fit your tan, red or any other colored interior. All is not lost, however. Once cured, the bed liner can be top coated with any paint to match your interior. That is all there is to this simple plastic repair and refinish project. This process is good for door panels, consoles, A-pillar trim, just about any plastic component that needs repair and restoration.
We used the same process on all 4 door/rear seat trim panels so that they would match.
Check out all the paint & body products
 Blue Seal Certified - Employing ASE-Certified Technicians helps your customers.")