NAPA Know How: How Do You Wire Up a Trailer to Your Car?
[ad_1]
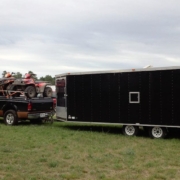
Connecting a trailer to your vehicle is easier than ever, especially with backup cameras to guide you. Yet, the process requires some knowledge about wiring and hitch pins, which control trailer lighting, turn signals, reverse lights and trailer braking.
How do you wire up a trailer to your car? Let’s dive in.
Ensure Your Vehicle Can Do the Job
It’s critical that your vehicle is rated for towing. Not all cars are, and even some utility vehicles aren’t designed for towing. If you tow with a vehicle not intended to pull, you risk damaging its brake and suspension systems. The engine and transmission may not be able to handle the strain, potentially damaging both.
Even if your vehicle is rated for towing, you need to know its towing capability. That information is typically listed in your owner’s manual or on the manufacturer’s website. The weight limit includes the trailer, a boat or other object sitting on the trailer, and anything inside. It’s a good idea to weigh your tow vehicle and trailer before you hit the road. Visit any truck stop with a certified scale to obtain weights.
Use a Wiring Harness
Wiring your trailer makes it possible for the turn signals, lighting, reverse lights and trailer brakes to activate. From both a safety and legal standpoint, each component must work. That’s where a trailer wiring harness comes in.
A trailer wiring harness is vehicle-specific, which means it’s designed for the make, model and year of your vehicle. Also known as a T-connector, it usually plugs in without any splicing required and supplies a standard connection such as a four-way flat. Each harness includes vehicle-specific plugs and, if necessary, an electrical converter. Power is drawn from the tow vehicle’s taillights or from a battery connection.
Make the Connection
When ordering a wiring harness, it’ll come with a four-, five-, six- or seven-way wiring connection, depending on the vehicle and how you’re planning to tow (i.e., a boat trailer with or without surge brakes, utility or camper trailer, or a fifth-wheel or gooseneck trailer).
The wiring is universally color-coded for ease of connection. The colors include:
- Green (right turn brakes).
- Yellow (left turn brakes).
- Brown (taillights).
- White (ground).
- Blue (electrical brakes).
- Black (reverse lights).
- Red (auxiliary power).
Simply bring the two connection points together, ground the white wire to the frame and you’re ready to go.
It’s important that the wires are properly grounded, otherwise, problems may arise, such as the brakes illuminating unevenly. Use a circuit tester to verify that each wire is correctly supplying power. If the trailer wiring connectors are dirty, apply white vinegar or an electrical degreaser to clean them.
Ready to Hit the Road
Before heading out, make sure the coupler latch is closed, the hitch pin is inserted and the safety chains are in place. Lastly, have someone check while you activate the headlights, turn signals and brakes. Verify a secure trailer connection by driving around your neighborhood. Once satisfied, you’re ready to begin your trip.
And just like that, you’ve transitioned from asking, “How do you wire up a trailer?” to “Are we there yet?”
Check out all the truck and towing products available on NAPA Online or trust one of our 17,000 NAPA AutoCare locations for routine maintenance and repairs. For more information on towing equipment, chat with an expert at your local NAPA AUTO PARTS store.
Photo courtesy of Flickr.
 Blue Seal Certified - Employing ASE-Certified Technicians helps your customers.")