NAPA Know How: Pro Tips for Strut Installation
[ad_1]
While testing your struts is easy, strut replacement is not. First, shock and strut replacement requires lifting and supporting your vehicle to let the suspension hang. If you know how to use a jack and jack stands, you’re already halfway there. Second, strut replacement or coil-over shock replacement usually requires a special strut compressor tool to do the job safely. On the other hand, quick struts are a great DIY option.
Here are a few pro tips to help your strut installation go smoothly.
Why Use Quick Struts?
MacPherson struts and coil-over shocks require a strut compressor or spring compressor tool to disassemble. This heavy-duty tool is necessary to overcome the intense spring pressure that supports your vehicle. But you can still renew your suspension and ride quality by using a safer method. When considering rear coil-over shock installation, these quick struts are a convenient and time-saving solution. Instead of removing the shock and disassembling it, simply remove the entire unit and install a new one.
Identify Strut Orientation
When installing quick struts, match up left and right units as well as their orientation. Shocks and struts may have brackets and tabs for mounting other parts, like height sensors and brake lines. Also, spring orientation can affect ride quality and steering. Use a paint marker to identify strut position and orientation, so you can install the new assemblies similarly. Something as simple as an “L” or an arrow can save a lot of headaches after shock installation.
Support Your Car With Jack Stands
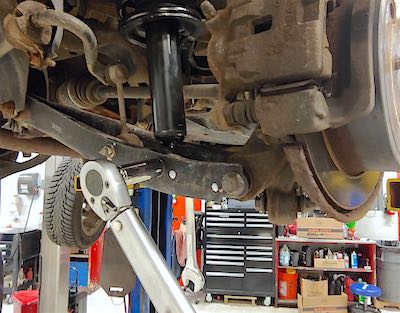
It may be tempting to lift the vehicle and remove the upper strut mounts with the wheels hanging, but the weight of the wheel may yank a wheel speed sensor cable or brake line, damaging it. After the vehicle is lifted and supported on jack stands, use the jack to support the control arm. Once the top mount is loosened — never touch the center nut — you can slowly lower the control arm to remove the whole strut assembly. If you see cables or hoses pulling, disconnect them from their brackets to prevent damage.
Maintain Proper Torque
 Though the weight of the vehicle plays a large part in keeping struts in their place, torque at both top and bottom mounts is critical. Aside from keeping everything together — no one wants to lose a wheel on the highway — proper torque maintains alignment angles that prolong tire life and stabilize steering. Look up torque specifications in the repair manual or ask your local mechanic for more information.
Align Your Wheels
If the strut mounts to the knuckle, front or rear, slight variations in strut manufacture may skew alignment angles, resulting in pulling or abnormal tire wear. Coil-over shocks usually mount to the suspension arm, which don’t affect the alignment angle if removed. Either way, after strut or shock installation, a wheel alignment will get everything lined up properly.
Because there’s no real shock and strut replacement interval, shock installation is typically recommended only if they’re leaking or noticeably bouncy. If you don’t feel confident installing quick struts or performing any other DIY job, bring the job to your local mechanic for professional assistance.
Check out all the steering and suspension parts available on NAPA Online or trust one of our 17,000 NAPA AutoCare locations for routine maintenance and repairs. For more information on strut replacement, chat with a knowledgeable expert at your local NAPA AUTO PARTS store.
Photos courtesy of Benjamin Jerew and Wikimedia Commons.


